Saturday, August 23, 2008
Video editing
Even though technology in computer is very influential in educational field today, we must always keep in mind that it could only assist us in teaching and learning, not to take the role of a teacher as the educator. The technology that we utilise should be practical and appropriate, so that they are useful for the young learners. Thus, we should not take it for granted to make teaching and learnining easier, but we should apply it to make teaching-learning more effective.
Some important factors to consider in the selection of a video are the length and independence of the extract, appropriateness of content, sound and picture quality, extent of visual support and language density. Extracts should be brief: Stempleski suggests that 2-3 minutes of video will provide sufficient material for a one hour lesson while Ellington & Race [1993 : 196-7] note that "concentration spans tend to be short, especially with a medium which has conditioned people to a relaxation approach. Sound quality is a particularly important factor because, as Arcario notes: "most language students...have little tolerance for poor sound quality" Visual support may be less important: MacWilliam [1986] suggests that it is actually easier for learners to understand video material when the face of the speaker is visible.
Well...in the progession of making this video, I try to integrate all these qualities. However, I admit that, I'm still in the process of learning, thus, me and my partner do the best our can to meet at least half of the criteria stated above...Hopefully our lecturer enjoys watching this video:)
Monday, August 18, 2008
Teachers as teaching aids??
A teacher can involve pupils more in classroom discussion and activities by following these simple steps:
2. Make an effort to keep eyes lively, aware and interested. Fix them on specific students, but not for so long that they become uncomfortable! Avoid focusing on the worst or best students.
Knowing that the teacher demands eye contact keeps the students alert. It also gives the teacher a feedback on the impact of what he or she is saying. This is particularly important in large classes, where "distance" between the teacher and learner is greater, and individual attention is more difficult.
3. Gestures that involve arms and hands are a very expressive visual aid. They can be used to describe shapes, actions, movements etc. but, remember to keep still while listening to a student . Otherwise the message sent to the student is that he is being longwinded or boring.
Habits such as fiddling with notes and books, playing with pens , key chains, or doodling with chalk on the black board can be both distracting and irritating for the student.
4. A smile can make wonders. It encourages the student to participate more actively and dispels the notion that the teacher is over critical. Also, try to look interested while a student is speaking. A smile, a grimace, a curl of the lips, raised eyebrows etc. at appropriate moments will send messages as needed.
5. Give students plenty of time to talk! It will keep them alert. Make small jokes, be friendly.
at the same time, call students by their name. It sounds warmer and friendlier and lessens the distance between the teacher and learner.
So, do all these make sense? We need to make use various types of teaching aids in order to develop pupils cognitively and aesthethically...but...there is no teaching aids that could take over teachers' role...:)
Sunday, August 10, 2008
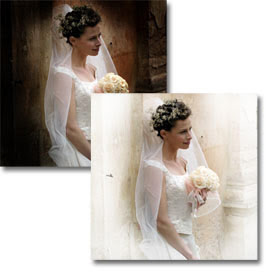
Photo editing
Now, I'm so excited to learn more about editing pictures, which could be very handful for me as a teacher in preparing teaching aids. One of the softwares that we can use for photo editing is Photo Studio.

There are new terms and functions which i come across:
Layers:
Think of cutting out your subject and placing it against a completely different background, or stacking several images over one another. Layering allows for limitless creative possibilities.
Burning and dodging:
These are terms left over from the darkroom days. These tools allow you to brighten or darken specific areas of your photo to add drama.
Filters:
Filters are special effects you can apply to your photos, such as charcoal drawing, blur, embossing, and many more.
I can be more creative using by using this software. I do not have to waste a lot time looking for pictures and cutting them out or going to the photocopy shop to enlarge the pictures . Everything can be done using one particular software. It is very practical for teachers as we have loads of work to be done. So, it is best for me to learn more deeply on how to use more advanced software so that I can produce a better teaching aid for my pupils.